Manus Invitation Code Application Guide
1078
English
ComfyUI Desktop Edition (Windows) Download
Please click the button below to download the corresponding ComfyUI desktop version installation package for Windows system

Download for Windows (NVIDIA): https://www.comfy.org/download
Installation steps for ComfyUI desktop version
Double-click the downloaded installation package file, and will first perform an automatic installation and generate a shortcut for the ComfyUI desktop version on the desktop.
Double-click the corresponding shortcut to enter the initialization settings of ComfyUI
ComfyUI desktop version initialization process
Start the interface

Click " Get Started " to start the initialization step
Select GPU (GPU selection)

The corresponding three options are:
Nvidia graphics card (recommended): Directly support pytorch and CUDA
Manual Configuration: You need to manually install and configure the python running environment, unless you know how to configure it, please do not choose
Enable CPU Mode Enable CPU Mode: only for developers and special cases, please do not select
If there are no special circumstances, please select NVIDIA as shown in the screenshot and click " Next " to proceed to the next step
Install location
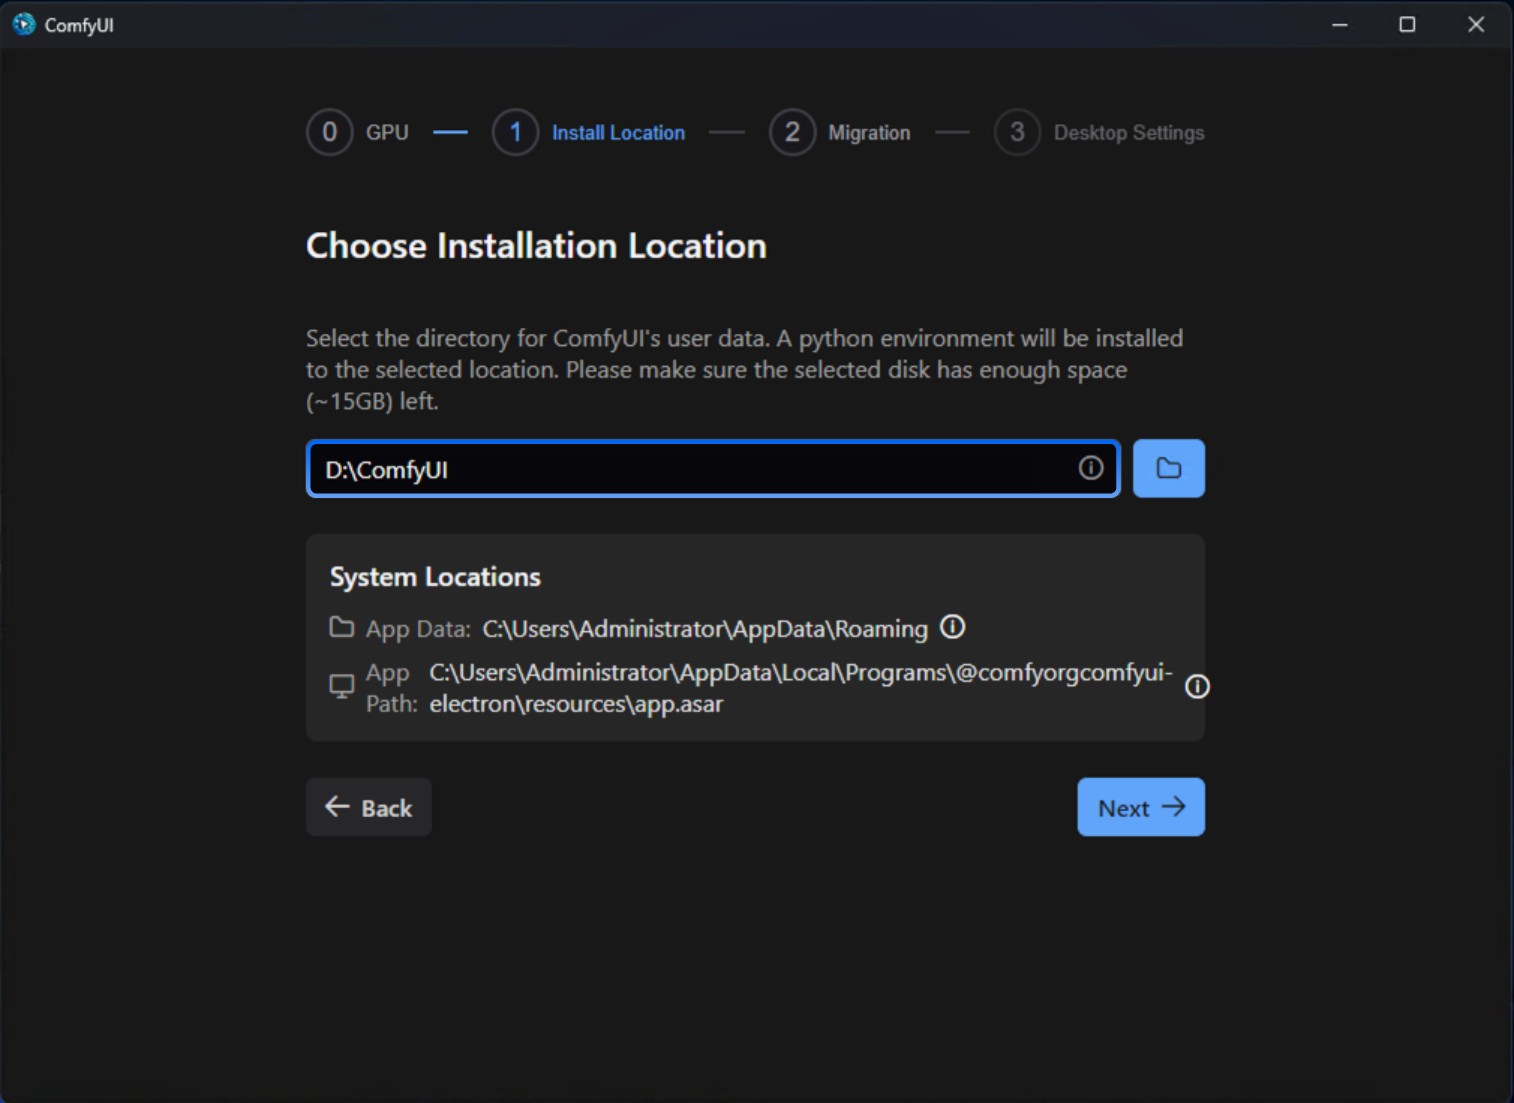
In this step, select the installation location of ComfyUI:
Python environment
Models Model Files
Custom Nodes Custom Nodes
suggestion:
Please select the SSD as the installation location, which will increase the speed of ComfyUI access to the model.
Please create a separate blank folder as the installation directory of ComfyUI
Please ensure that the corresponding disk has at least " 15G " disk space to ensure the installation of ComfyUI Desktop
ComfyUI not all files are installed in this directory, and some files will still be installed on the C drive. If you need to uninstall later, you can refer to the uninstallation part of this guide to complete the complete uninstallation of the ComfyUI desktop version.
After completion, click " Next " to proceed to the next step
Migrate from Existing Installation (migate from existing installations - optional)
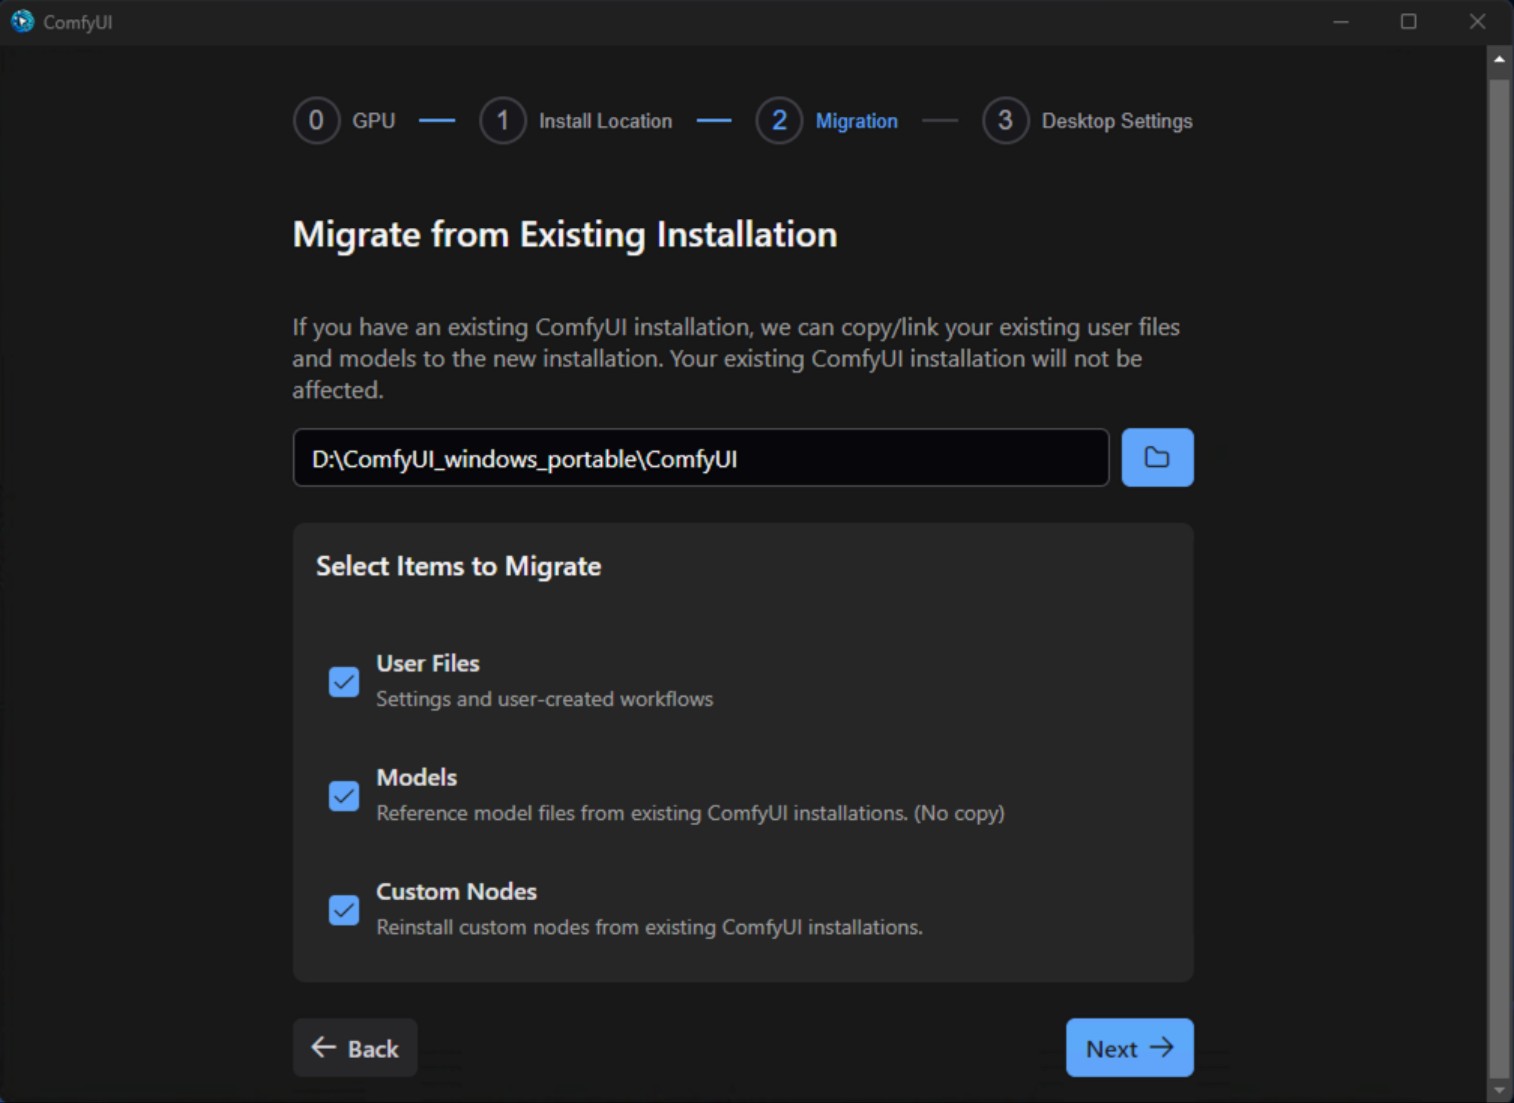
In this step, you can migrate your existing ComfyUI installation content to the ComfyUI desktop version. As shown in the figure, you select the original D:ComfyUI_windows_portableComfyUI installation directory. The installer will automatically recognize the corresponding directory:
User Files User Files
Models model file: It will not be copied, but will be associated with the desktop version.
Custom Nodes Custom Nodes: The custom node will be reinstalled
Don't worry, this step will not copy the model file. You can check or uncheck the corresponding options according to your needs, and click " Next " to enter the next step.
Desktop Setting (Desktop Edition Settings)

This step is preference settings
Automatic Updates Automatic Updates: Whether to set up automatic updates when ComfyUI updates are available
Usage Metrics Usage Analysis: If enabled, we will collect anonymous usage data to help us improve ComfyUI
Mirror Settings Mirror Settings: Since the program needs to download Python online to complete the installation of the relevant environment, if you also have a red ❌ as shown in the figure during installation, it is prompted that this may cause the subsequent installation process to fail, please refer to the following steps for processing.
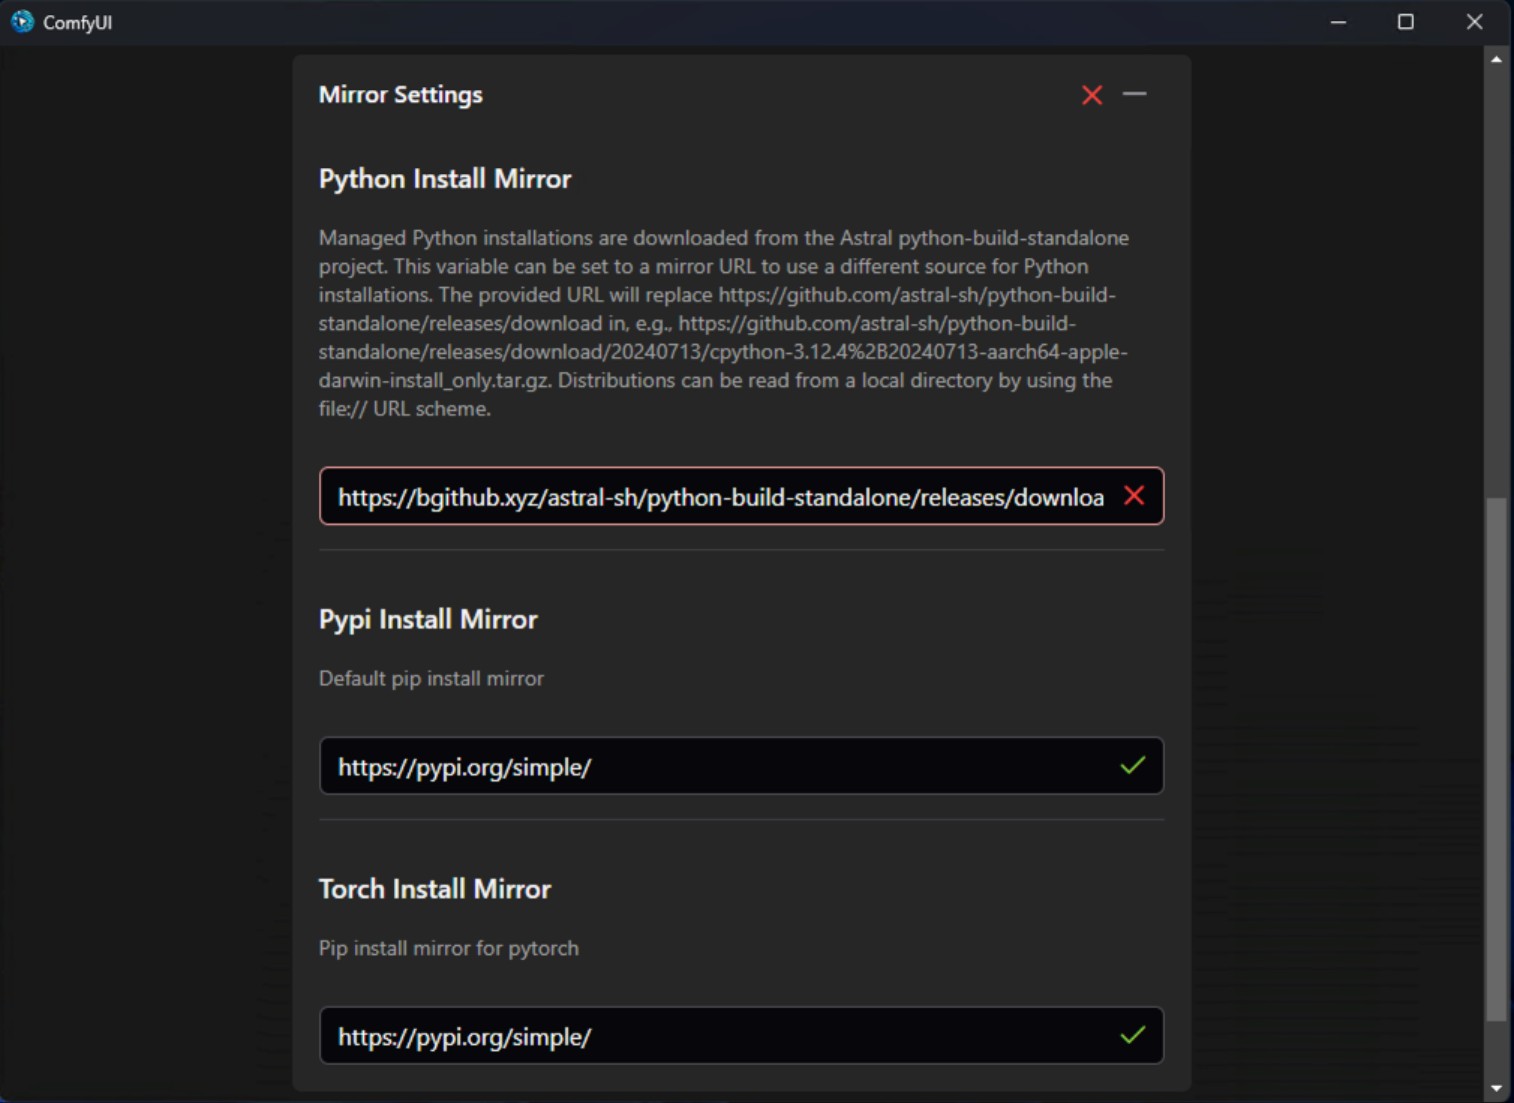
Expand the corresponding image settings and find the specific failed image. The error in the current screenshot is " Python Install Mirror " mirror failed.
For different mirror errors, you can refer to the following content to try to manually find different mirrors and replace them
The following situations are mainly for users in China
Python installation image
You need to find the GitHub image address and build the image address pointing to the Python-build-standalone repository releases
https://github.com/astral-sh/python-build-standalone/releases/download
Build a link similar to the following format
https://xxx/astral-sh/python-build-standalone/releases/download
PyPI Mirror
Alibaba Cloud: https://mirrors.aliyun.com/pypi/simple/
Tencent Cloud: https://mirrors.cloud.tencent.com/pypi/simple/
University of Science and Technology of China: https://pypi.mirrors.ustc.edu.cn/simple/
Shanghai Jiaotong University: https://pypi.sjtu.edu.cn/simple/
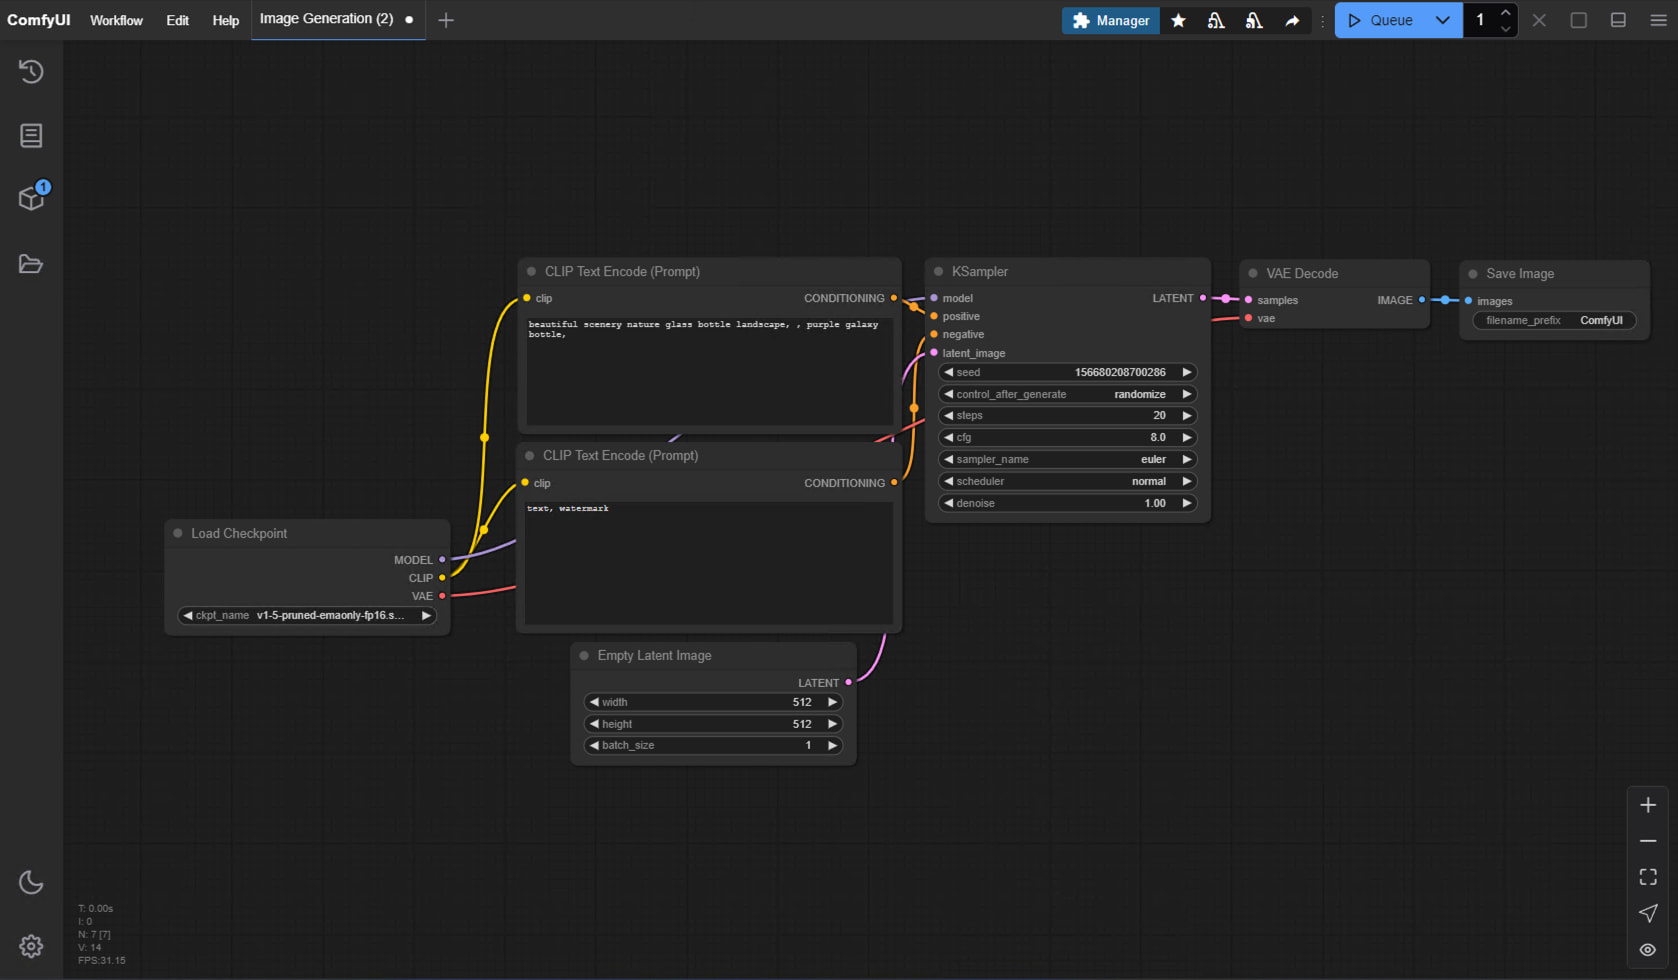
Complete the installation
If everything is correct, the installer will complete the installation and automatically enter the ComfyUI desktop interface, which means that the installation has been successfully