ComfyUI node interface function description
1010
English
This article is a description of the ComfyUI user interface, including basic operations, menu settings, node operations and other common user interface options. However, due to frequent updates of ComfyUI version, there may be lag in the content of this chapter. Please refer to the actual interface as the basis.
After the ComfyUI v0.2.0 version, the user interface has been redesigned and many new functions have been added. Currently, the interface that switches back to the old menu in menu settings is supported.
Currently, ComfyUI's current version (2024-12-25) has added many language support, including:
English
Chinese
Japanese
Korean
Russian

As marked on the figure, the current menu functions of the new version are as follows
| Serial number | name | shortcut key | Function description |
|---|---|---|---|
| 1 | Queue History | Q | Historical image generation queue history, you can quickly switch to browse here |
| 2 | Node Library | N | New ways to browse all ComfyUI nodes, here you can see the ComfyUI Core node library, or browse other nodes brought by Custom Nodes, providing powerful filtering and filtering functions |
| 3 | Model Library | M | Browse all local models indexed by ComfyUI, and drag directly to load the corresponding model using the corresponding loading node. |
| 4 | Workflows | W | Browse all the local workflows you saved in ComfyUI, and double-click to load the corresponding workflow in the Create a new workflow tab window. |
| 5 | Topic Switch | - | Switch the current ComfyUI interface theme, currently supported: Dark, Light |
| 6 | set up | - | Click to open settings |
| 7 | Workflow Tags Tab | - | Supports opening multiple workflows at the same time. Click the plus sign to create a new workflow tag. |
| 8 | Execution workflow queue (Queue) | Ctrl/Command + Enter | Add the current workflow to the image generation queue, Ctrl/Command + Shift + Enter to take the current workflow as the most preferred queue |
| 9 | Clear pending tasks | - | Clear all pending tasks in the current workflow queue |
| 10 | Bottom panel | - | The function of the old version of Until node log can be viewed here. |
| 11 | Show or hide menus | - | Show or hide menu after clicking |
| 12 | Adaptable view | - | After clicking, the current workflow node will be displayed in the current view completely. |
| 13 | View Selection Mode | Space (space) | Supports switching between select mode and pan mode, and can be quickly switched using the Space key. |
| 14 | Switch node connection line display | - | After clicking, switch the node connection line display mode, the default display |

The new version has added many menu functions on the side, mainly to improve the functions of image generation queue management, node management, model management, workflow management, etc. Since this part of the functions is relatively simple to use, it will not be explained in detail. There are generally some functions below.
Image generation queue management, quickly browse queue history pictures
Node management, node library browsing, node search, node filtering
Model management, model library browsing, model search, model filtering
Workflow management, workflow browsing, workflow search, workflow filtering
Under normal circumstances, ComfyUI will automatically switch languages according to your current browser/system language. If you open and run ComfyUI and find that the language is not what you want, you can manually switch languages in the menu settings.
The old version menu only supports English, the new version menu supports multiple languages, and switching languages will not take effect on the old version menu interface.

In menu settings, you can switch between the new and old version menus. After setting the corresponding options to Disable in ComfyUI > Menu > Use New Menu, you can switch back to the old version menu interface.

The following picture is a screenshot of the menu interface of the old version of comfyUI

The comfyUI interface includes
Operation main interface
Workflow node information
Menu Panel
If you see additional panel information in other videos/tutorials, it is likely that the corresponding user has installed additional plug-ins
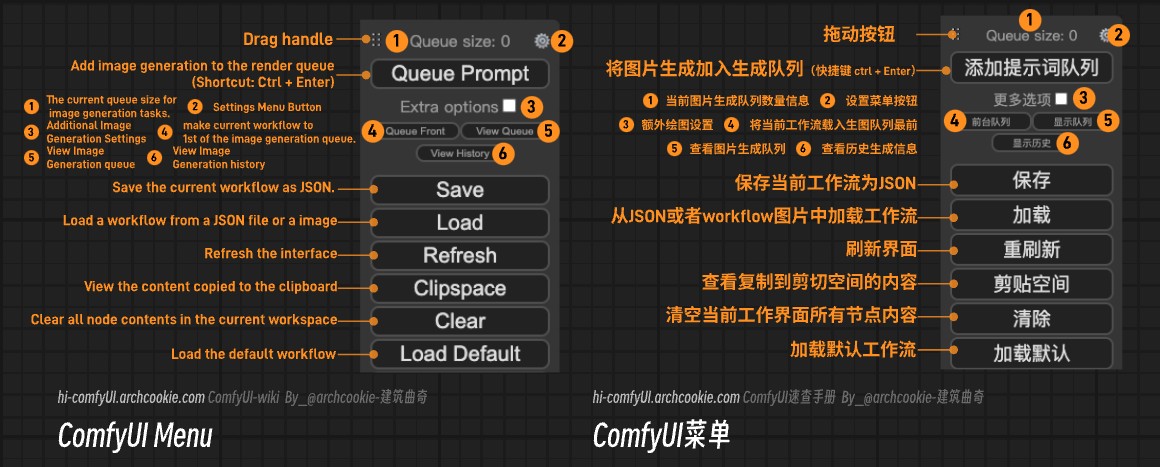
As shown in the figure above, the corresponding function description has been commented, and the following is the corresponding description content:
Drag button: After clicking, you can drag the menu panel to move the position
Queue size: Current number of image generation tasks
Settings button: Click to open the ComfyUI settings panel
Add a prompt word queue: The current workflow will be added to the image generation queue (the last position), the shortcut key Ctrl+Enter
Additional options: Picture generation related options, such as the number of single generations, automatically perform image generation tasks when parameters change, etc.
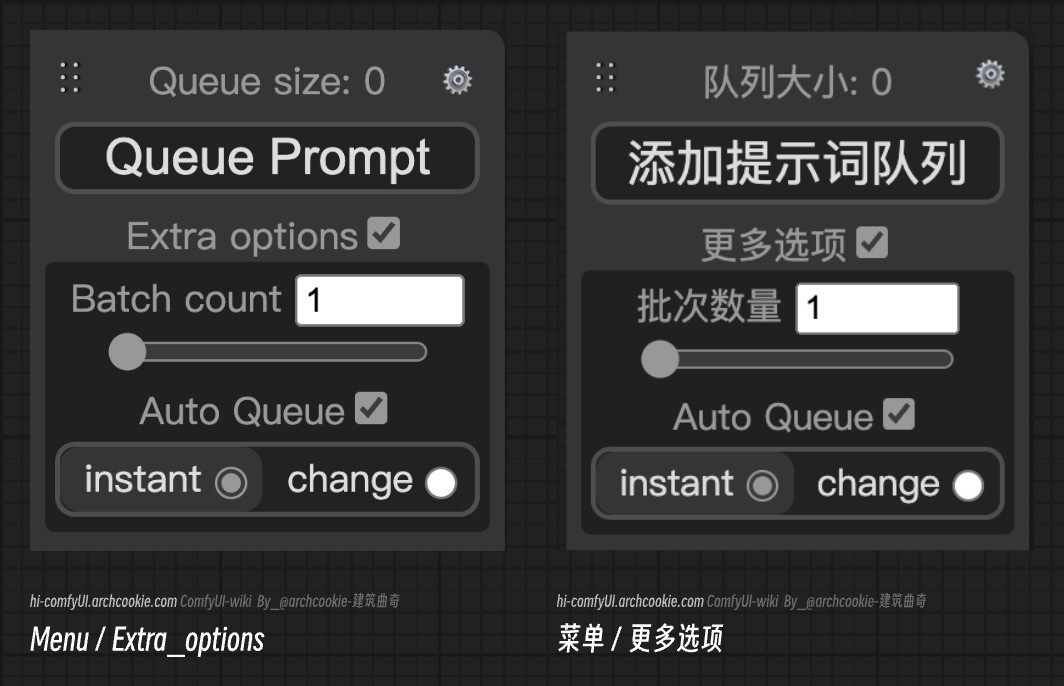
Number of batches: Number of pictures generated by a single image Auto Queue: Automatically join the current workflow to the raw image queue according to the set conditions
instant-Real-Time: Real-time generation
Change-When there is a change: When there is a change in the workflow parameter, perform image generation
Foreground Queue: Add the current workflow to the image generation queue and serve as the top priority queue
Display queue: Display the current image generation task list
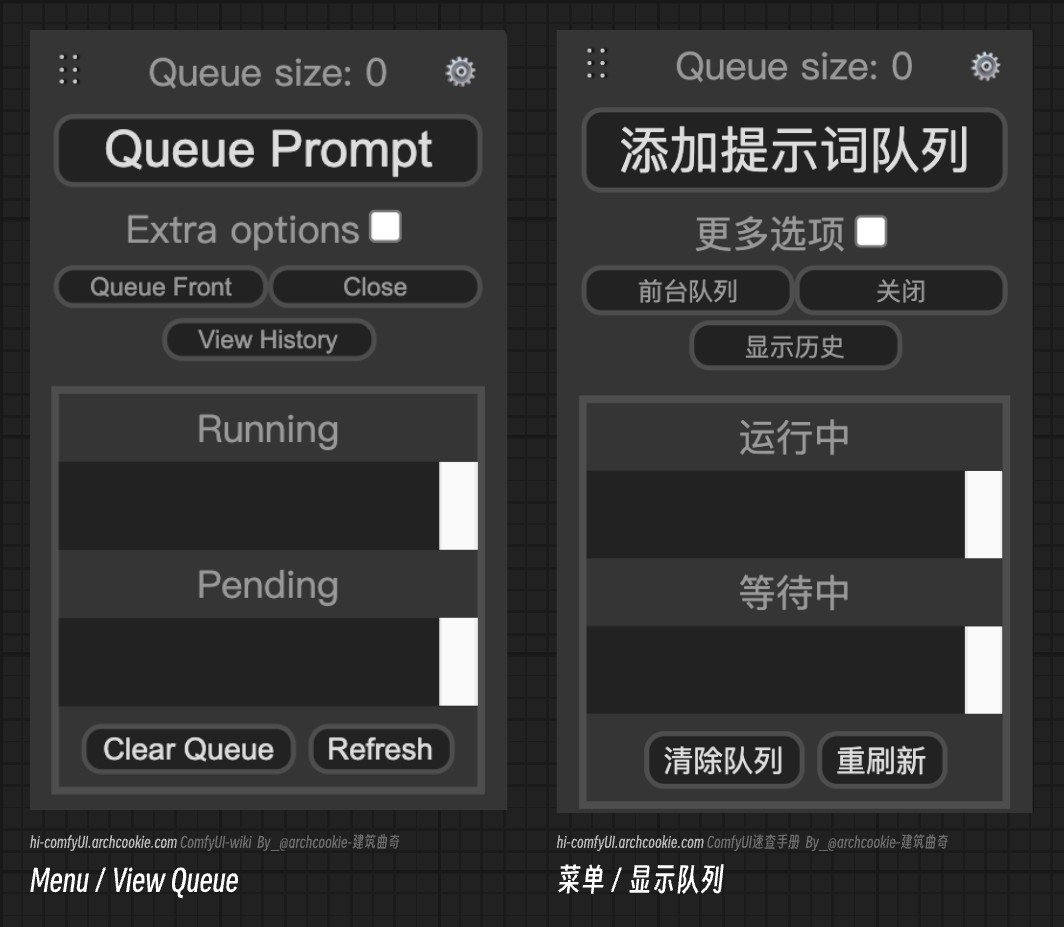
Running: The queue currently in progress of image generation
Waiting: The queue currently queued for image generation
Clear queue: Delete raw map queue information
Refresh: Refresh queue information
Display history: Displays the history and information generated by the image
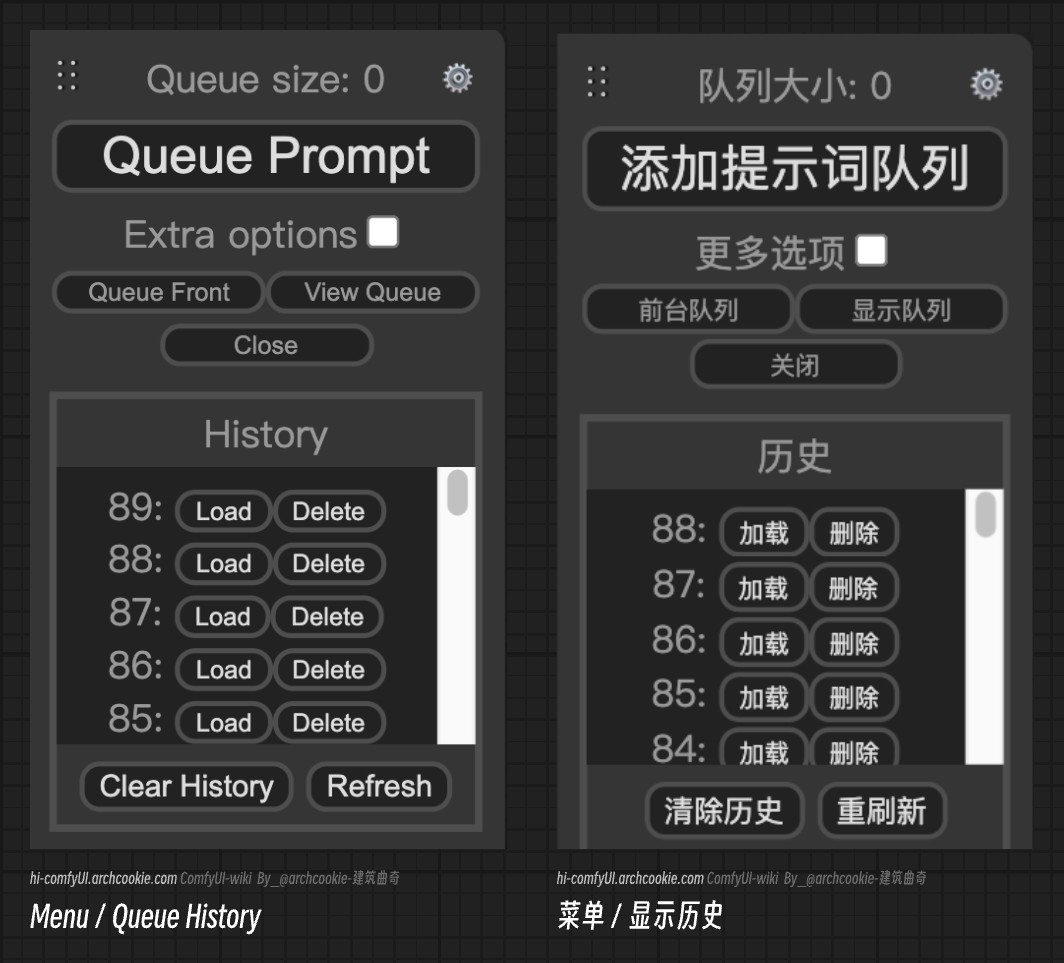
History list: The history of image generation. Click to load to load the corresponding image generation parameters into the workflow. Click to delete to delete the corresponding image generation record information. Clear history: Delete the history of image generation Refresh: Refresh the history
Save: Save the current workflow as a JSON file
Loading: Load workflow from JSON files or images generated by comfyUI
Refresh: Refresh the current interface
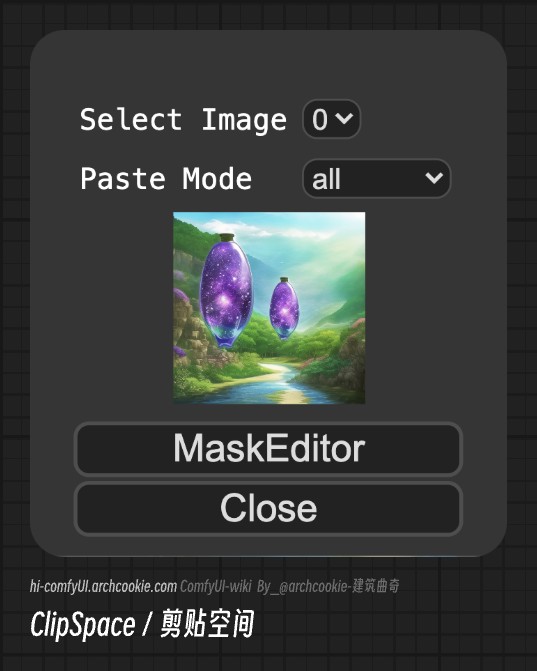
Clip Space: Shows the content copied to the clip space
After you complete the image generation, you can right-click the corresponding image on the preview/save image node. Then click the clip space to display the currently copied image. You can load the image into a node that supports pasting (such as: Loading image node)
Clear: Clear all node contents in the current workspace
Loading default: Loading ComfyUI default workflow