Meta launches new AI chatbot features: actively sending messages to improve interactive experience
Abacus.AI launches DeepAgent, all-round AI assistant leading the intelligent transformation of enterprises
In the era of big models, where will general visual models go?
X platform pilots AI to generate "community notes", Grok access information verification process
Before starting this tutorial, please make sure that you have installed ComfyUI. If you haven't installed it, please follow the ComfyUI installation guide to install it first.
You should have at least one chekcpoint model in your ComfyUI
If you don't have the corresponding model installed, I recommend you start with the following models (just select one of them):
Dreamshaper: This is a model based on SD1.5. There are good results in realism and portrait monetization. Go to download
SD1.5: Go to download and find v1-5-pruned-emaonly.ckpt to download
Take the official portable version as an example. We need to store the downloaded model in the corresponding folder.
ComfyUI_windows_portable // ComfyUI official portable version
├── ComfyUI // comfy UI main folder
│ ├── models // Model installation folder
│ | ├── checkpoints // SD model installation location
│ | | ├── SD1.5 // Create a new SD1.5 version folder
│ | | | | ├── dreamshaper_8.safetensors // Downloaded model file
│ | | | └── v1-5-pruned-emaonly.ckpt // Downloaded model file
Make sure you have started the ComfyUI service. If it is not started, please refer to Start the ComfyUI service for startup.
If the default workflow is not loaded after running ComfyUI, please refer to the steps below to load the ComfyUI default literary workflow
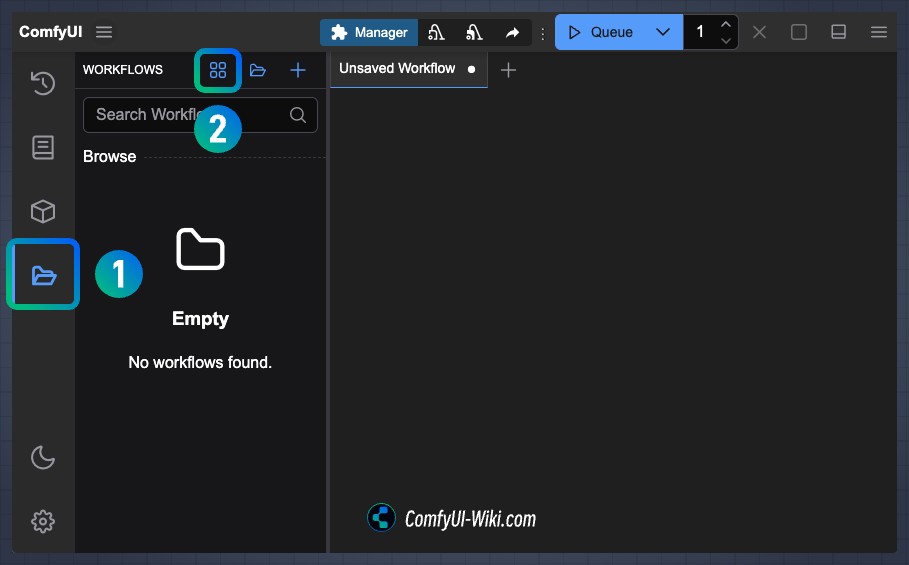
1. Click on the Workflow panel in the sidebar
2. Click to enter the browsing workflow template
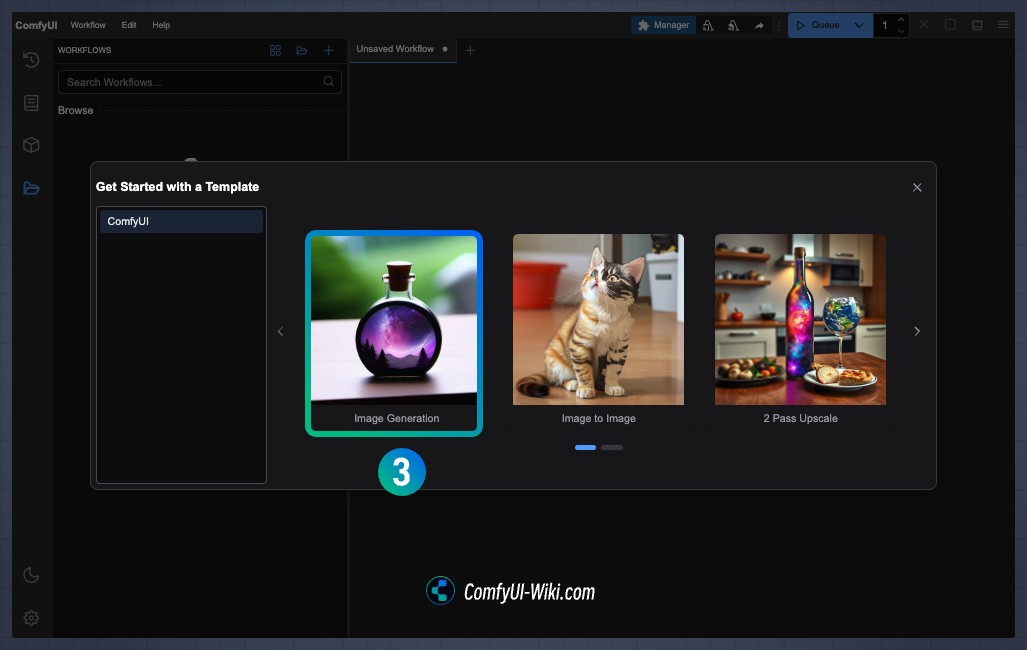
3. Select Image Generation in the default workflow template to load the default workflow
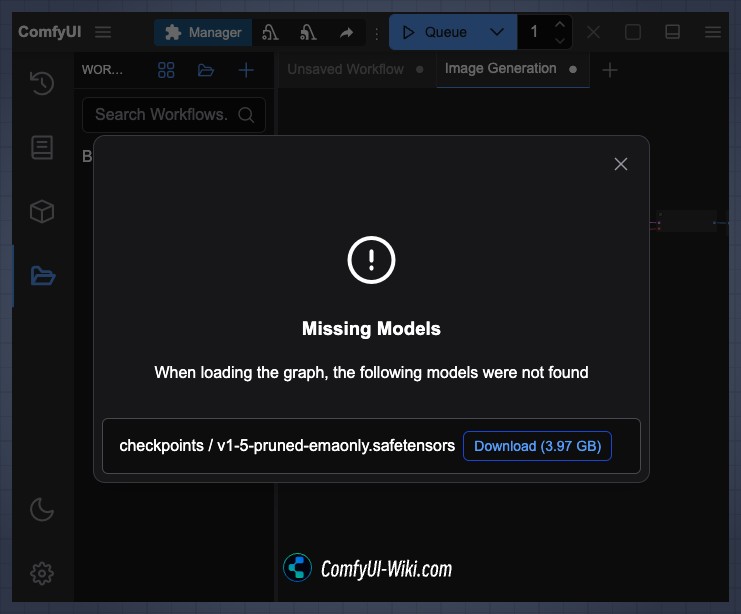
4. If you have this pop-up prompt
If you downloaded the model and installed it yourself as I suggest, then you can ignore closing this pop-up window
If you have not downloaded any model files, you can choose to click Download ComfyUI to automatically download the corresponding model files to the corresponding folder.
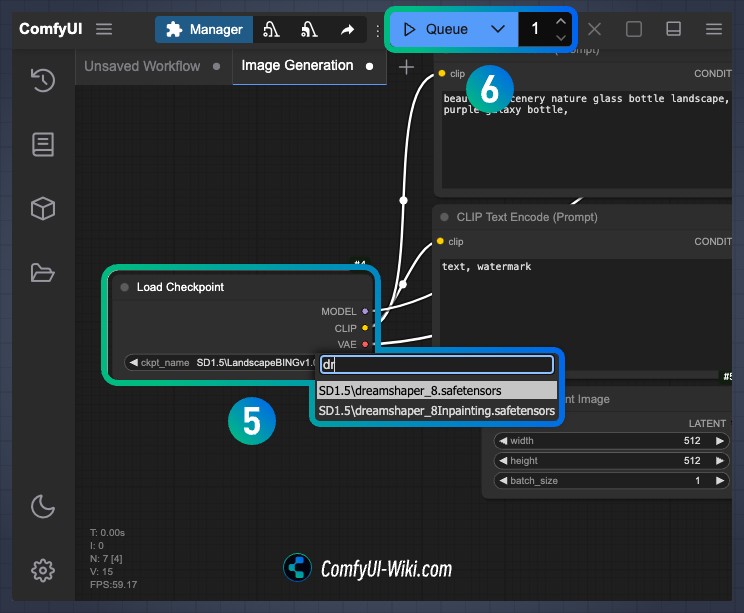
5. After the workflow is loaded, please zoom in to the position of Load checkpoint and select the model file you need in ckpt_name. You can use the right click or use the arrows of the corresponding node to select the model file.
6. Click Queue to generate images
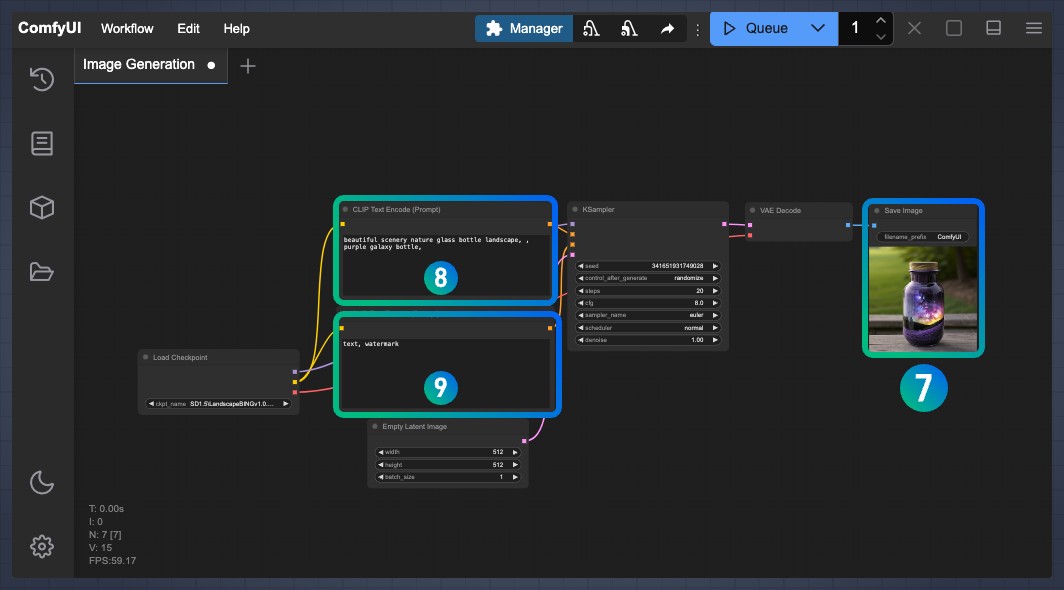
7. If everything is correct, you can see the generated image on the Save Image node. You can right-click to save the corresponding image locally or view the ComfyUI/output folder to see if there are any other images.
You can continue to try to modify the prompt word node CLIP Text Encode to see the effects of different prompt words bringing
8. Because it is connected to the positive input of the [Ksampler](/zh/comfyui-nodes/sampling/k-sampler) node, the content entered in the text box here is what you want to appear in the screen.
9. Because it is connected to the negative input of the [Ksampler](/zh/comfyui-nodes/sampling/k-sampler) node, the content entered in the text box here is what you do not want to appear in the screen.
Modify the content at 8 and 9 to try different types of content