English
English
Image to Image is a workflow in ComfyUI that allows users to take an image as input and generate a new image.
Graphics can be used in the following scenarios:
1. The conversion of original image style, such as converting realistic photos into artistic style
2. Convert line drawing images to realistic images
3. Image repair
4. Coloring of old photos
5.... etc.
To explain it with a metaphor, it is probably like this: You need the painter to draw works that meet your requirements based on your reference pictures.
If you carefully compare this tutorial and the Wensheng Tutorial, you will find that the process of the Husheng Tutorial is very similar to that of the Wensheng Tutorial, except that there is an input reference picture as the input condition. That is, in Wensheng Tu, we let the painter (drawing model) generate freely according to our prompt words, while in the Husheng Tutorial, we let the painter (drawing model) generate pictures based on our reference pictures and prompt words.
Please make sure you have at least one SD1.5 model file in the ComfyUI/models/checkpoints folder.
You can use these models:
1. v1-5-pruned-emaonly-fp16.safetensors
3. Anything V5
Save and download the following image locally, then drag or use ComfyUI to open it, and the corresponding workflow will be loaded

or load image to image workflow template in ComfyUI
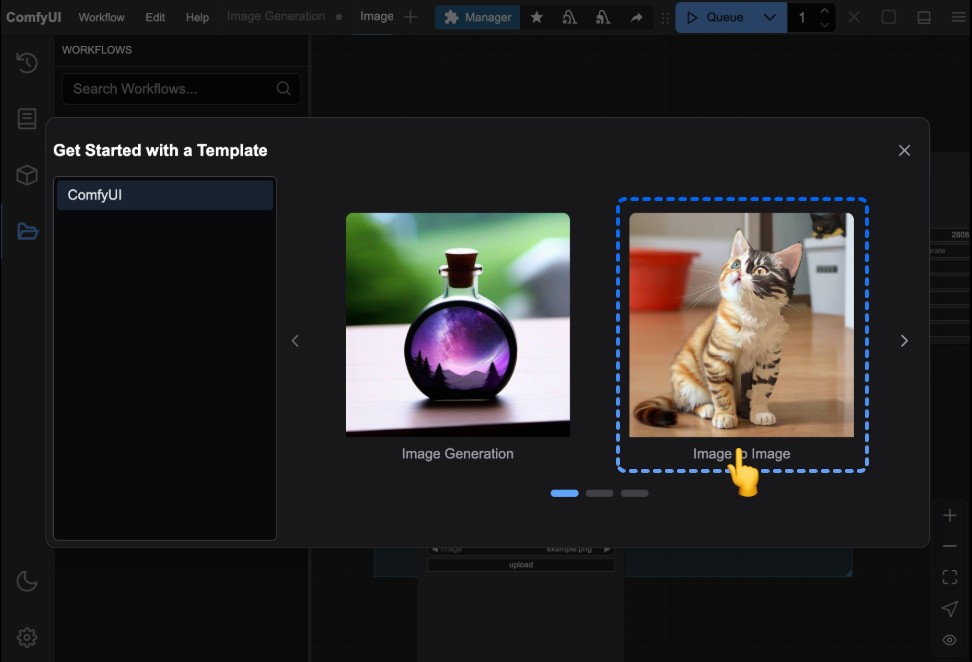
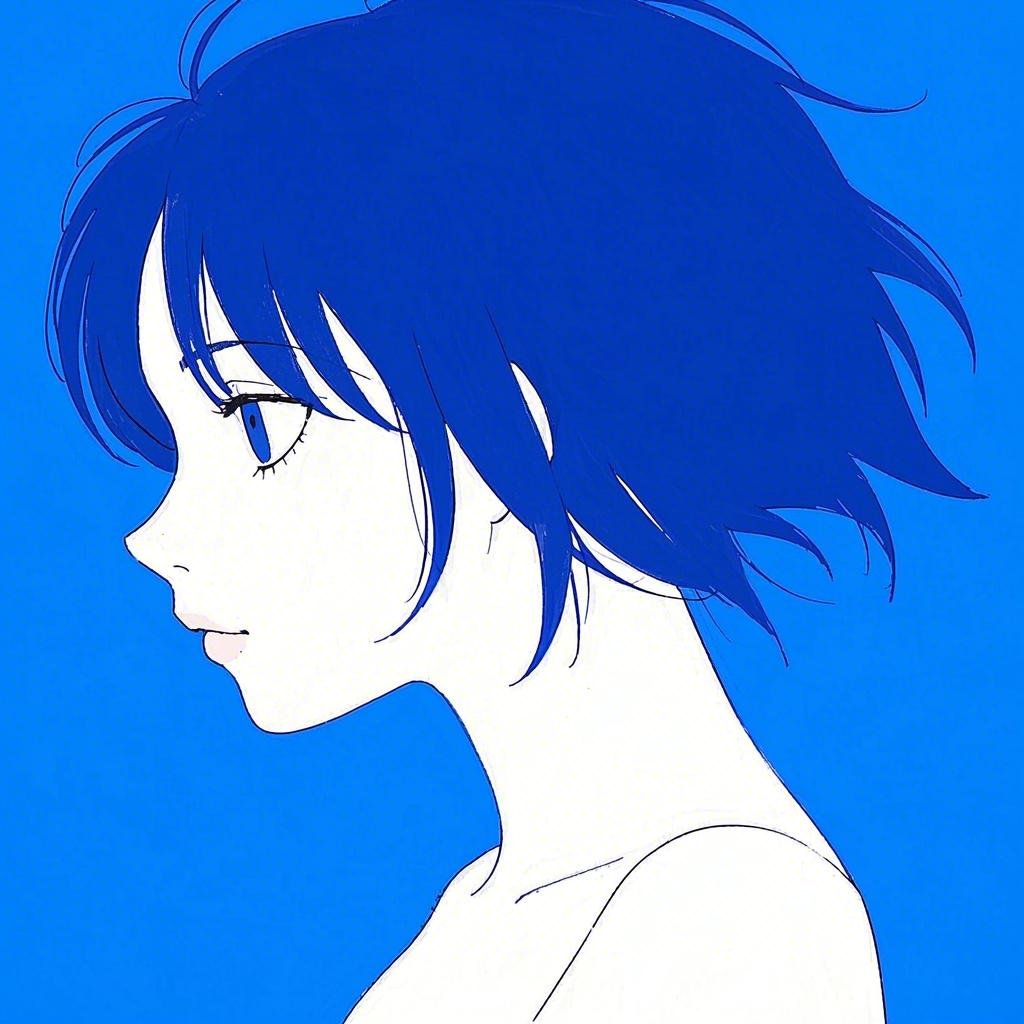
Download the image below as a usage example, we will use it in the following steps
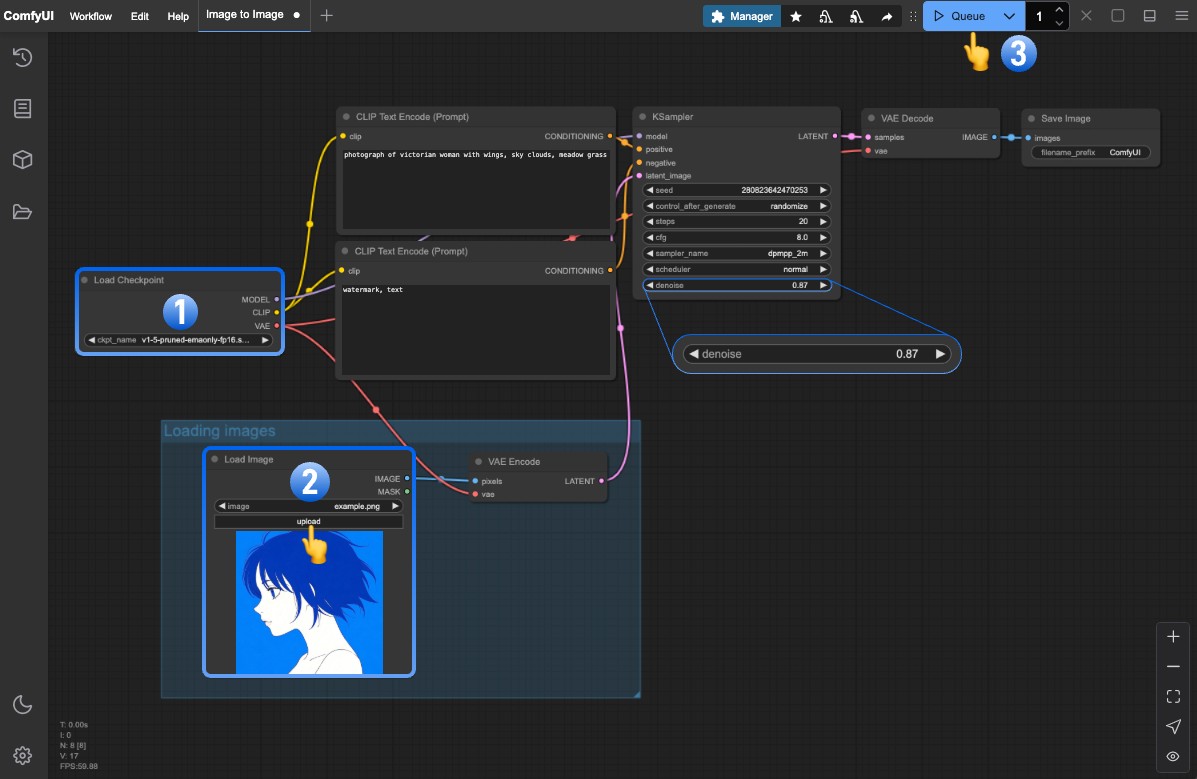
After loading the image production workflow, please compare the picture and complete the following operations according to the serial number to complete the generation of the sample workflow
1. Load your local drawing model in the Load Checkpoint node
2. Click the upload button on the Load Image node to upload the image provided in the preparation step
3. Click the Queue button, or use the shortcut key Ctrl + Enter to perform image generation
1. Try to modify the denoise parameter in the KSampler node, gradually change from 1 to 0, and observe the changes in the generated image
2. Change your own prompt words and reference pictures to generate your own picture effects
The core of the graph workflow is that the denoise parameter in the KSampler node is less than 1
If you have adjusted the denoise parameter, you will find that after generating it:
1. The smaller the denoise, the smaller the difference between the generated image and the reference image.
2. The larger the denoise, the greater the difference between the generated picture and the reference picture.
Because denoise determines the noise intensity added to the latent space image after the corresponding image is converted into a latent space image, if denoise is 1, the corresponding latent space image will become a completely random noise, which is the same as the latent space generated by the empty latent image node, and all features of the reference image will be lost.
For the corresponding principles, please refer to the principles explained in the text's biopic tutorial.