English
English
OpenPose ControlNet is a ControlNet model specially used to control the posture of characters in images. It helps the AI maintain the correct character pose when generating new images by analyzing the character poses in the input image. This model has better effects in character image generation, animation generation, game character generation, etc., because it can accurately understand and maintain the character's posture.
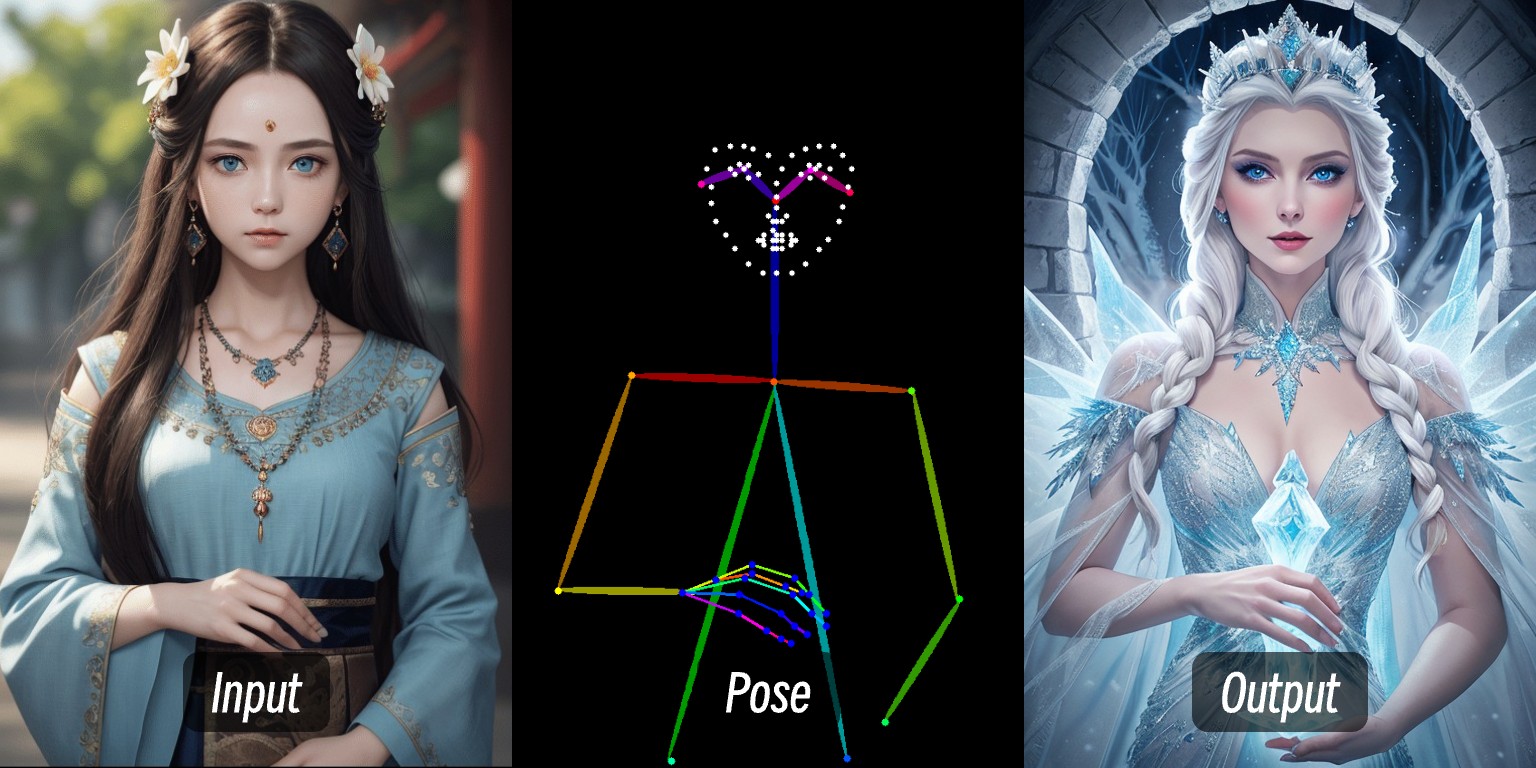
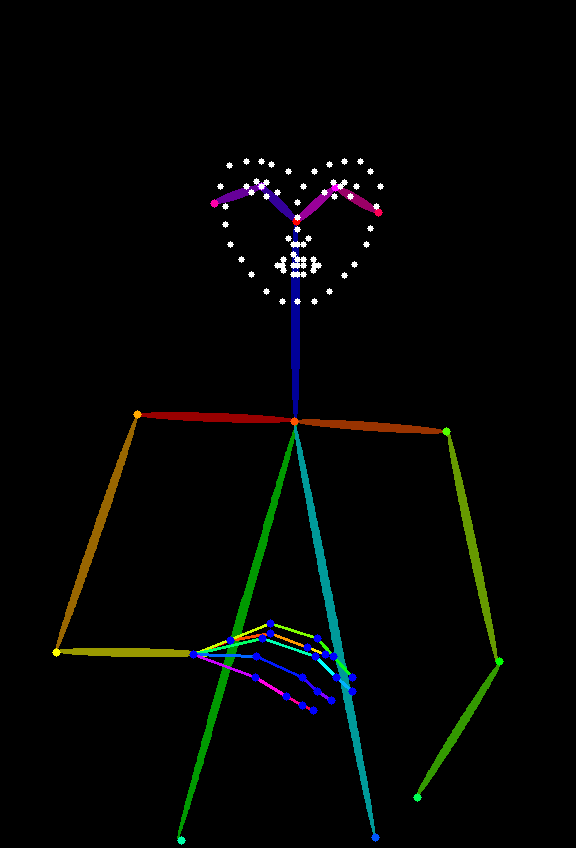
The use of OpenPose ControlNet requires the use of OpenPose diagram to control the character posture, and then the OpenPose ControlNet model is used to control the character posture in the generated image. The corresponding OpenPose diagram effect is as follows:

Like the Depth diagram, you can use the ComfyUI ControlNet Auxiliary Preprocessors plug-in to generate OpenPose diagrams. If you don't want to install this plug-in, you can also use an online tool like open-pose-editor to generate OpenPose diagrams for posture control. It is still recommended to install the ComfyUI ControlNet Auxiliary Preprocessors plug-in here, because this plug-in function will be frequently used in subsequent daily use.
Since the relevant nodes used in this article are the new Apply ControlNet, which is different from the old nodes, it is recommended that you upgrade or install the latest version of ComfyUI first. You can refer to the related tutorials:
Since ComfyUI Core does not have the corresponding OpenPose image preprocessor, you need to pre-download the corresponding preprocessor plug-in. This tutorial requires the use of the ComfyUI ControlNet Auxiliary Preprocessors plug-in to generate OpenPose diagrams.
Here, the tutorial for using ComfyUI Manager to install plug-in installation can be used in more detail.
The latest version of ComfyUI Desktop has pre-installed the ComfyUI Manager plugin
First, the following model needs to be installed:
| Model Type | Model File | Download address |
|---|---|---|
| SD1.5 Basic Model | dreamshaper_8.safetensors | Civitai |
| OpenPose ControlNet Model | control_v11f1p_sd15_openpose.pth(must) | Hugging Face |
Please place the model file in the following structure:

Since the SD version and controlnet have a version corresponding relationship, I have added a layer of SD1.5 folder here to facilitate subsequent model management.
Refresh or restart ComfyUI after installation is completed and let the program read the corresponding model file
Two workflow files are provided here
SD1.5 OpenPose ControlNet Img Workflow
Download the above workflow, drag the workflow in after running ComfyUI or use the ComfyUI shortcut key Ctrl+O to open the workflow file
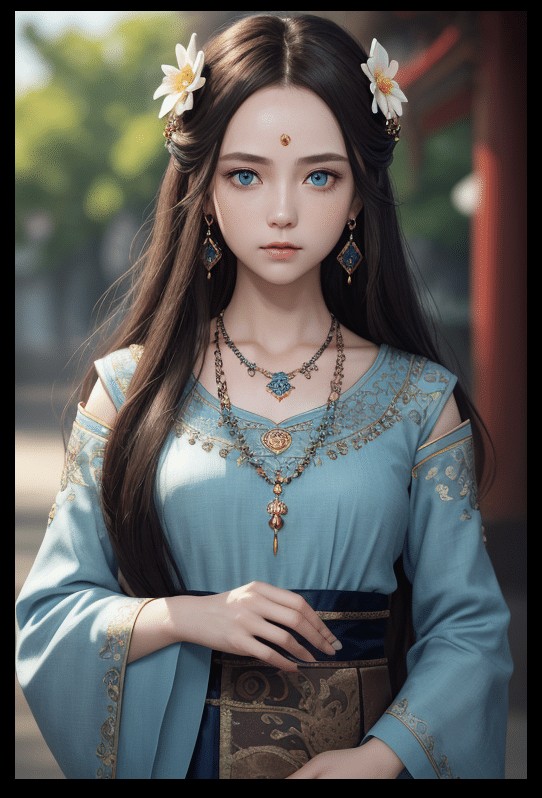
Please download the image below and load OpenPose ControlNet Img in the Load Image node
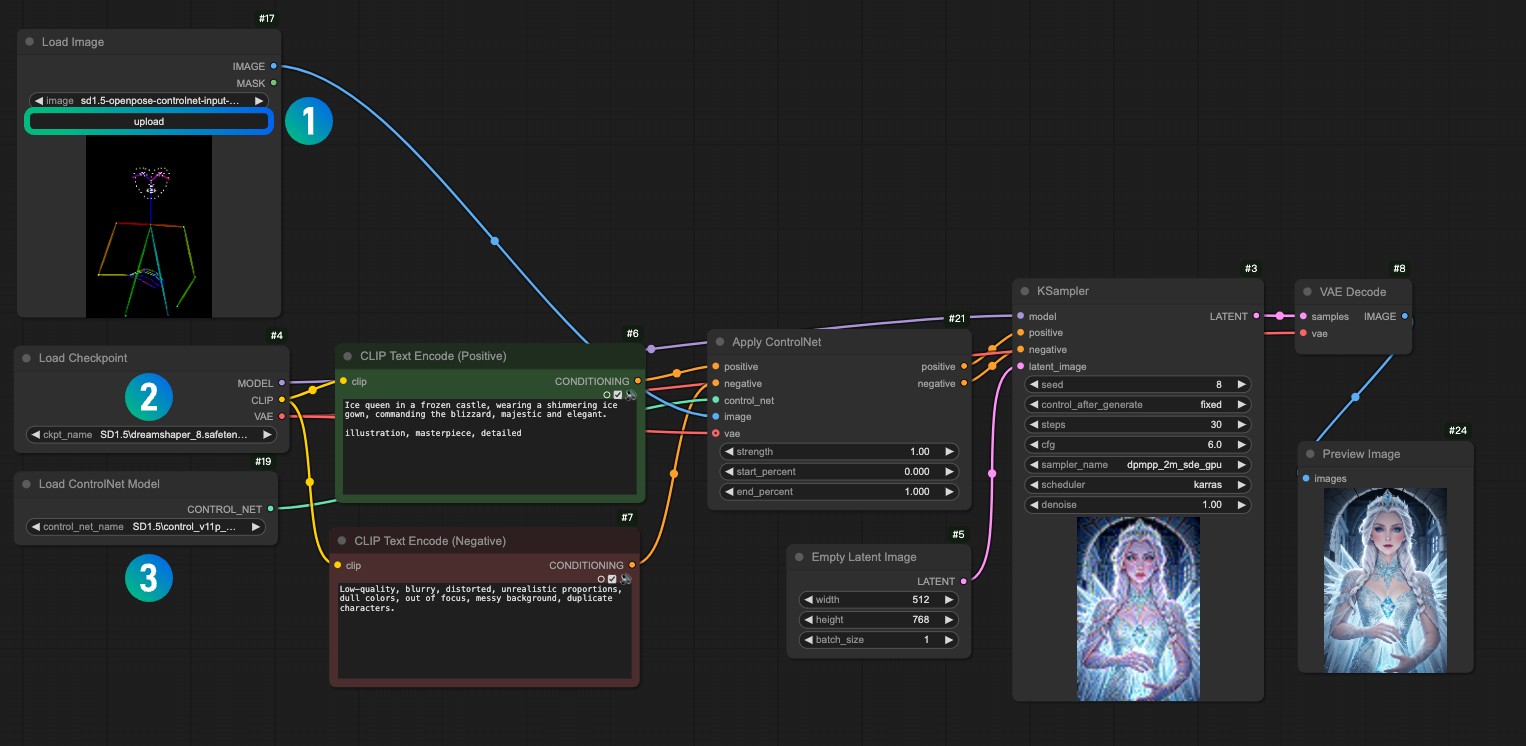
1. Load the reference image in the 1 Load Image node
2. Select the model you installed in the 2 Load Checkpoint node
3. Select the control_v11f1p_sd15_openpose.pth model in the 3 Apply ControlNet node.
4. Use Queue or shortcut key Ctrl+Enter to run the workflow for image generation
There is a difference from the above workflow. In some cases, we do not necessarily have an ready-made OpenPose diagram. Then we need to use the ComfyUI ControlNet Auxiliary Preprocessors plug-in to preprocess the reference image, and then use the processed image as input image to use it with the ControlNet model.
SD1.5 OpenPose ControlNet Preprocessor Workflow
Download the above workflow, drag the workflow in after running ComfyUI or use the ComfyUI shortcut key Ctrl+O to open the workflow file
Please download the image below and load the OpenPose ControlNet input in the Load Image node
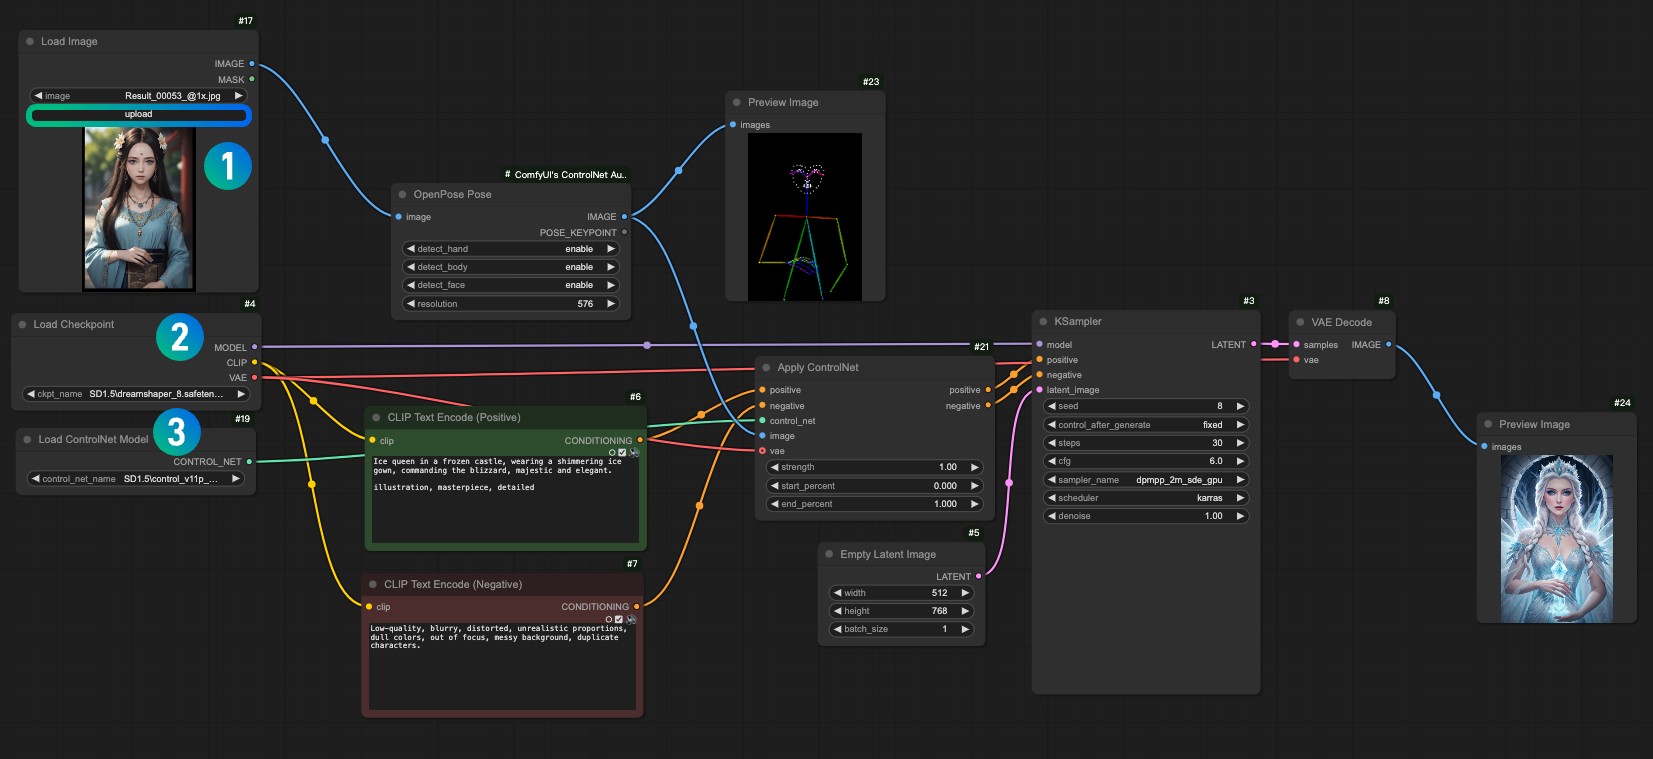
1. Load the input image in the 1 Load Image node
2. Select the model you installed in the 2 Load Checkpoint node
3. Select the control_v11f1p_sd15_openpose.pth model in the 3 Apply ControlNet node.
4. Use Queue or shortcut key Ctrl+Enter to run the workflow for image generation
ComfyUI Core node, the core node document has corresponding descriptions in the current website document
1. Apply ControlNet node: Apply ControlNet
2. Load the ControlNet model: ControlNet Loader
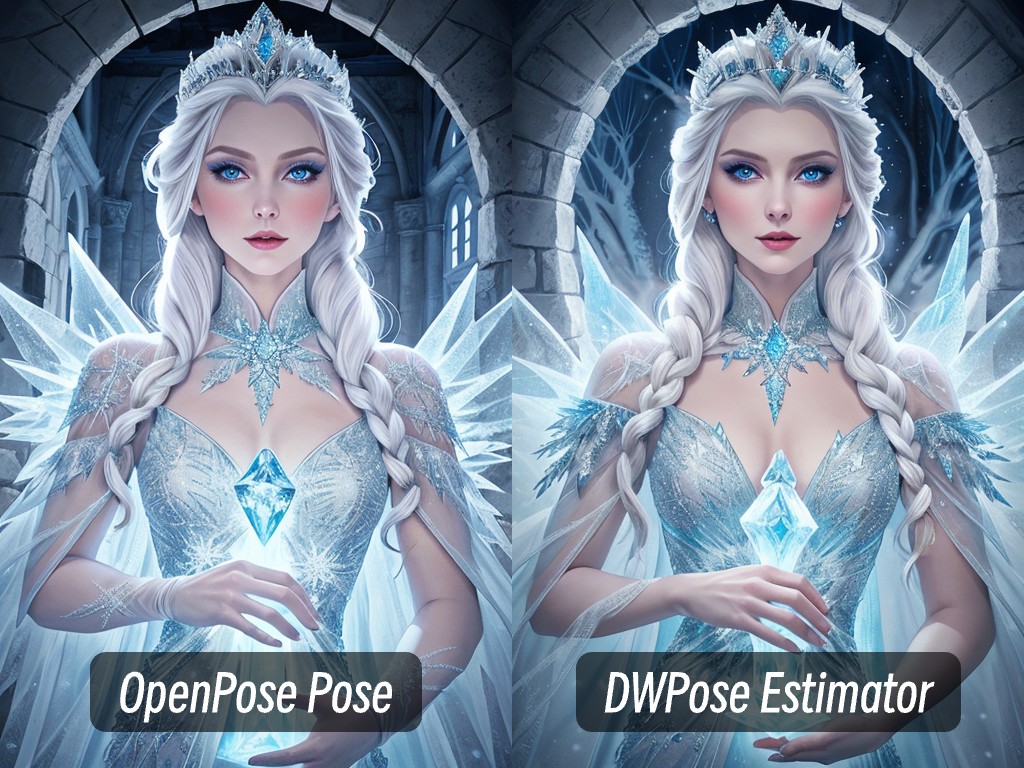
Regarding the nodes for Pose detection, there are two different nodes, namely the OpenPose Pose node and the DWPose Estimator node. Their functions are to extract hand, body, and facial posture information from the image and generate skeleton diagrams.
The DWPose Estimator node is a pose detection algorithm based on DWPose. The OpenPose Pose node is a pose detection algorithm based on OpenPose. In the workflow I provide, I use the OpenPose Pose node. You can try the DWPose Estimator node after successful run to see the differences.
OpenPose Pose Node

| Enter parameters | describe | Parameter Options |
|---|---|---|
| images | Enter an image | - |
| detect_hand | Whether to detect the hand | enable / disable |
| detect_face | Whether to detect the face | enable / disable |
| detect_body | Whether to detect the body | enable / disable |
| Resolution | The resolution of the output image | - |
| Output parameters | describe | Parameter Options |
|---|---|---|
| image | Image output from image processing | - |
| POSE_KEYPOINT | Skeleton Point | - |
DWPose Estimator node

| Enter parameters | describe | Parameter Options |
|---|---|---|
| images | Enter an image | - |
| detect_hand | Whether to detect the hand | enable / disable |
| detect_face | Whether to detect the face | enable / disable |
| detect_body | Whether to detect the body | enable / disable |
| Resolution | The resolution of the output image | - |
| bbox-detector | Whether to detect the human body frame in the image | enable / disable |
| pose_estimator | Different methods of pose detection | - |
| Output parameters | describe | Parameter Options |
|---|---|---|
| image | Image output from image processing | - |
| POSE_KEYPOINT | Skeleton Point | - |