English
English
In ControlNet, multiple ControlNets can be used in combination to achieve more precise control. For example, when generating characters, if the character's body is dislocation, depth can be superimposed to ensure the correct relationship between the front and back of the body.
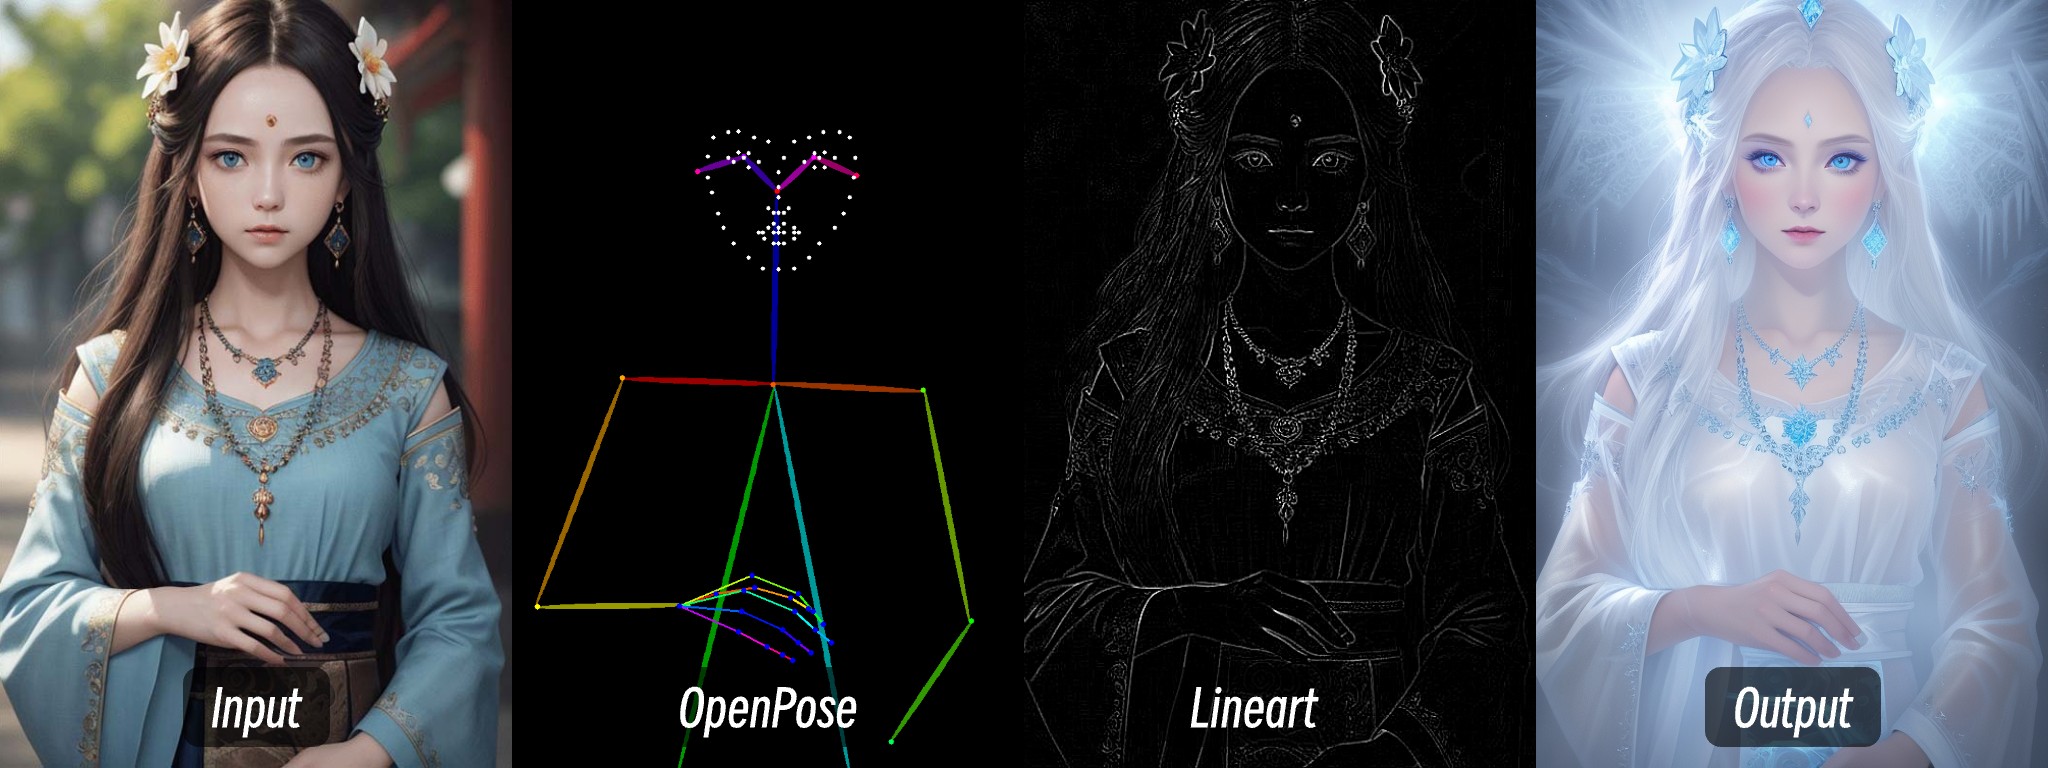
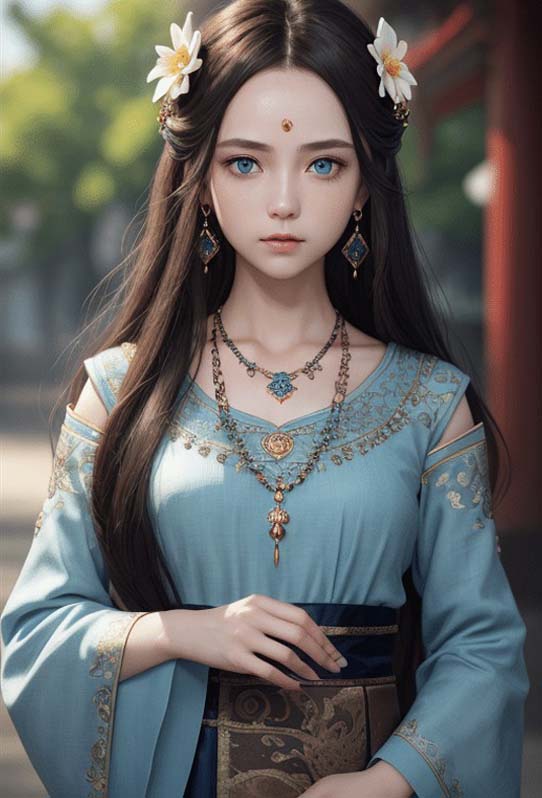
This article will use OpenPose and Lineart to achieve a change in picture style.
1.OpenPose is used to control character posture
2.Lineart is used to control the character's clothing and facial features to keep consistent
In fact, it is mainly to connect the conditions of the Apply ControlNet node when using multiple ControlNets.
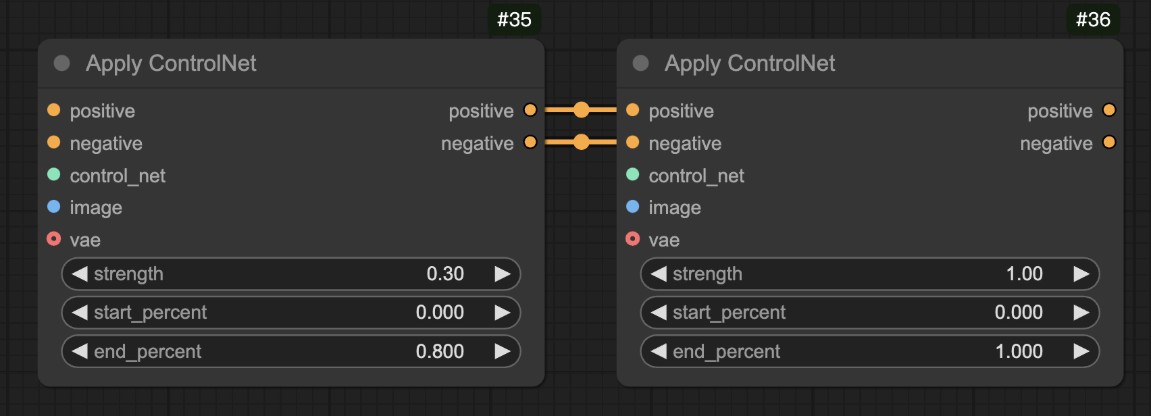
Apply ControlNet nodes For the stage control of ControlNet, please refer to the Apply ControlNet node instructions.
If you have learned other tutorials before ComfyUI Wiki, you should have installed the corresponding plug-in, so you can ignore this step
Since ComfyUI Core does not have the corresponding Depth image preprocessor, it is necessary to pre-download the corresponding preprocessor plug-in. This tutorial requires the use of the ComfyUI ControlNet Auxiliary Preprocessors plug-in to generate depth maps.
Here, the tutorial for using ComfyUI Manager to install plug-in installation can be used in more detail.
The latest version of ComfyUI Desktop has pre-installed the ComfyUI Manager plugin
First, you need to download the following model:
| Model Type | Model File | Download address |
|---|---|---|
| SD1.5 Basic Model | dreamshaper_8.safetensors(optional) | Civitai |
| OpenPose ControlNet Model | control_v11f1p_sd15_openpose.pth(must) | Hugging Face |
| Lineart | control_v11p_sd15_lineart.pth(must) | Hugging Face |
The SD1.5 model can use the model on your own computer, but in this tutorial I used dreamshaper_8 as an example
Please place the model file in the following structure:

Download the workflow and image files below
SD1.5 Multi ControlNet Workflow

1. Load the corresponding SD1.5 Checkpoint model in serial number 1
2. Load the input image in serial number 2 Load Image
3. Load the OpenPose ControlNet model in serial number 3
4. Load Lineart ControlNet model in serial number 4
5. Use Queue or shortcut key Ctrl+Enter to run the workflow for image generation
Control network combination
Canny edge + Depth depth map + MLSD linear detection
Parameter configuration plan
| ControlNet Type | Main functions | Recommended weight | Preprocessing parameter recommendations | Phase of action |
|---|---|---|---|---|
| Canny | Ensure accurate outline of building structure | 0.9-1.0 | Low threshold: 50, high threshold: 150 | Phase 1 |
| Depth | Building a three-dimensional spatial perspective relationship | 0.7-0.8 | MiDaS model, Boost contrast enhancement is enabled | Phase 2 |
| MLSD | Correct straight line deformation to maintain geometric accuracy | 0.4-0.6 | Minimum line length: 15, maximum line distance: 20 | Stage 3 |
Control network combination
OpenPose posture + Lineart line pattern + Scribble color blocks
Parameter configuration plan
| ControlNet Type | Main functions | Recommended weight | Resolution adaptation suggestions | Collaborative strategy |
|---|---|---|---|---|
| OpenPose | Control the overall posture and movement of the character | 1.0 | Keeps consistent with the output size | Main control network |
| Lineart | Refine facial features and equipment details | 0.6-0.7 | Enable Anime mode | Intervention in the middle and late stages |
| Scribble | Define clothing color matching and texture distribution | 0.4-0.5 | Preprocessing with SoftEdge | Affects only the color layer |
Control network combination
HED soft edge + Depth depth of field + Normal normal map
Parameter configuration plan
| ControlNet Type | Main functions | Weight interval | Preprocessing key settings | Effect |
|---|---|---|---|---|
| HED | Capture product soft edges and surface transitions | 0.8 | Gaussian fuzzy: σ=1.5 | Contour softness control |
| Depth | Simulate real light and shadow and background blur | 0.6 | Close-up enhancement mode | Space hierarchy construction |
| Normal | Enhanced surface details and reflective properties of the material | 0.5 | Generate size: 768x768 | Material details enhancement |
Control network combination
Segmentation partition + Shuffle tone + Depth hierarchy
Hierarchical control strategy
| Control layer | Main functions | Weight | Area of action | Time to intervene |
|---|---|---|---|---|
| Seg | Dividing screen element areas (sky/building) | 0.9 | Global composition | Full control |
| Shuffle | Control overall tone and style transfer | 0.4 | Color distribution | Intervention in the middle and late stages |
| Depth | Create depth of field effects and spatial levels | 0.7 | Background bokeh area | Early intervention |